A slow bathroom sink is annoying. A completely stopped-up one can throw off your entire morning routine. The good news is that most clogs are caused by a buildup of hair, soap scum, and toothpaste, and you can usually fix them yourself if you know how to unclog a bathroom sink drain the right way. No special tools or plumbing experience required.
At Bizzy B Plumbing, we handle drain clogs across Knoxville and East Tennessee every single day. But we’ll be the first to tell you: not every clog needs a service call. Many of them respond well to simple DIY methods you can do with items already under your kitchen sink.
This guide walks you through the most effective fixes, starting with the easiest and working up from there. We’ll cover what causes bathroom sink clogs, which methods actually work, and how to tell when it’s time to call a professional plumber instead of fighting it yourself.
Before you start: what’s clogging it and safety checks
Before you grab any tools, take a minute to figure out what’s actually causing the blockage. The right approach to how to unclog a bathroom sink drain depends entirely on what’s sitting in there. Jumping straight to a chemical cleaner or a drain snake when hot water and dish soap would clear the problem wastes your time and can actually damage your pipes or make the job harder than it needs to be.
What’s actually blocking your drain
Most bathroom sink clogs fall into one of three categories: hair and soap buildup near the drain opening, a grease-like soap scum mass deeper in the pipe, or a physical object that slipped down the drain. Hair is the most common culprit. It wraps around the stopper, catches soap residue with every use, and gradually forms a dense mat that water can barely push through.
Soap scum is sneakier than hair. It coats the inside walls of the pipe slowly over months, narrowing the opening until water drains sluggishly or stops moving altogether.
Toothpaste and personal care products also contribute to buildup, especially in homes with hard water. The minerals in hard water bond with soap and product residue to form a stubborn coating inside the pipe. Occasionally, a physical object like a bottle cap, earring back, or small razor cover falls in and creates an instant, complete blockage. Knowing which category fits your situation helps you pick the right fix on the first try instead of working through every method in the book.
Here’s a quick breakdown of the most common culprits and what to watch for:
| Clog Type | Where It Usually Sits | Warning Signs |
|---|---|---|
| Hair mat | At or just below the stopper | Water pools, then slowly drains |
| Soap scum buildup | Inside the pipe, several inches down | Gradual worsening over weeks |
| Physical object | P-trap or just past drain opening | Sudden, complete blockage |
| Product residue | Coating pipe walls | Gurgling, slow drainage |
Safety checks before you grab anything
A few quick checks before you start will protect both you and your plumbing. Never mix chemical drain cleaners or use one right before plunging. If a cleaner is already sitting in the drain, the splash back from a plunger can send caustic chemicals onto your skin and into your eyes. That risk is real and worth taking seriously.
Check whether the slow drain is isolated to this one sink or affecting other fixtures in your home. If your toilet, bathtub, and sink are all draining slowly at the same time, the problem is likely in the main sewer line, not the bathroom drain itself. That situation goes beyond DIY fixes and needs a licensed plumber.
Run through this checklist before starting any method:
- Confirm only the bathroom sink is affected, not other fixtures
- Remove any chemical drain cleaner from the area before using a plunger
- Look under the sink for existing leaks or damaged pipe joints
- Set a bucket and old towels nearby before opening the P-trap
- Put on rubber gloves and keep them on throughout the job
Taking two minutes for these steps keeps the work clean, safe, and moving in the right direction from the start.
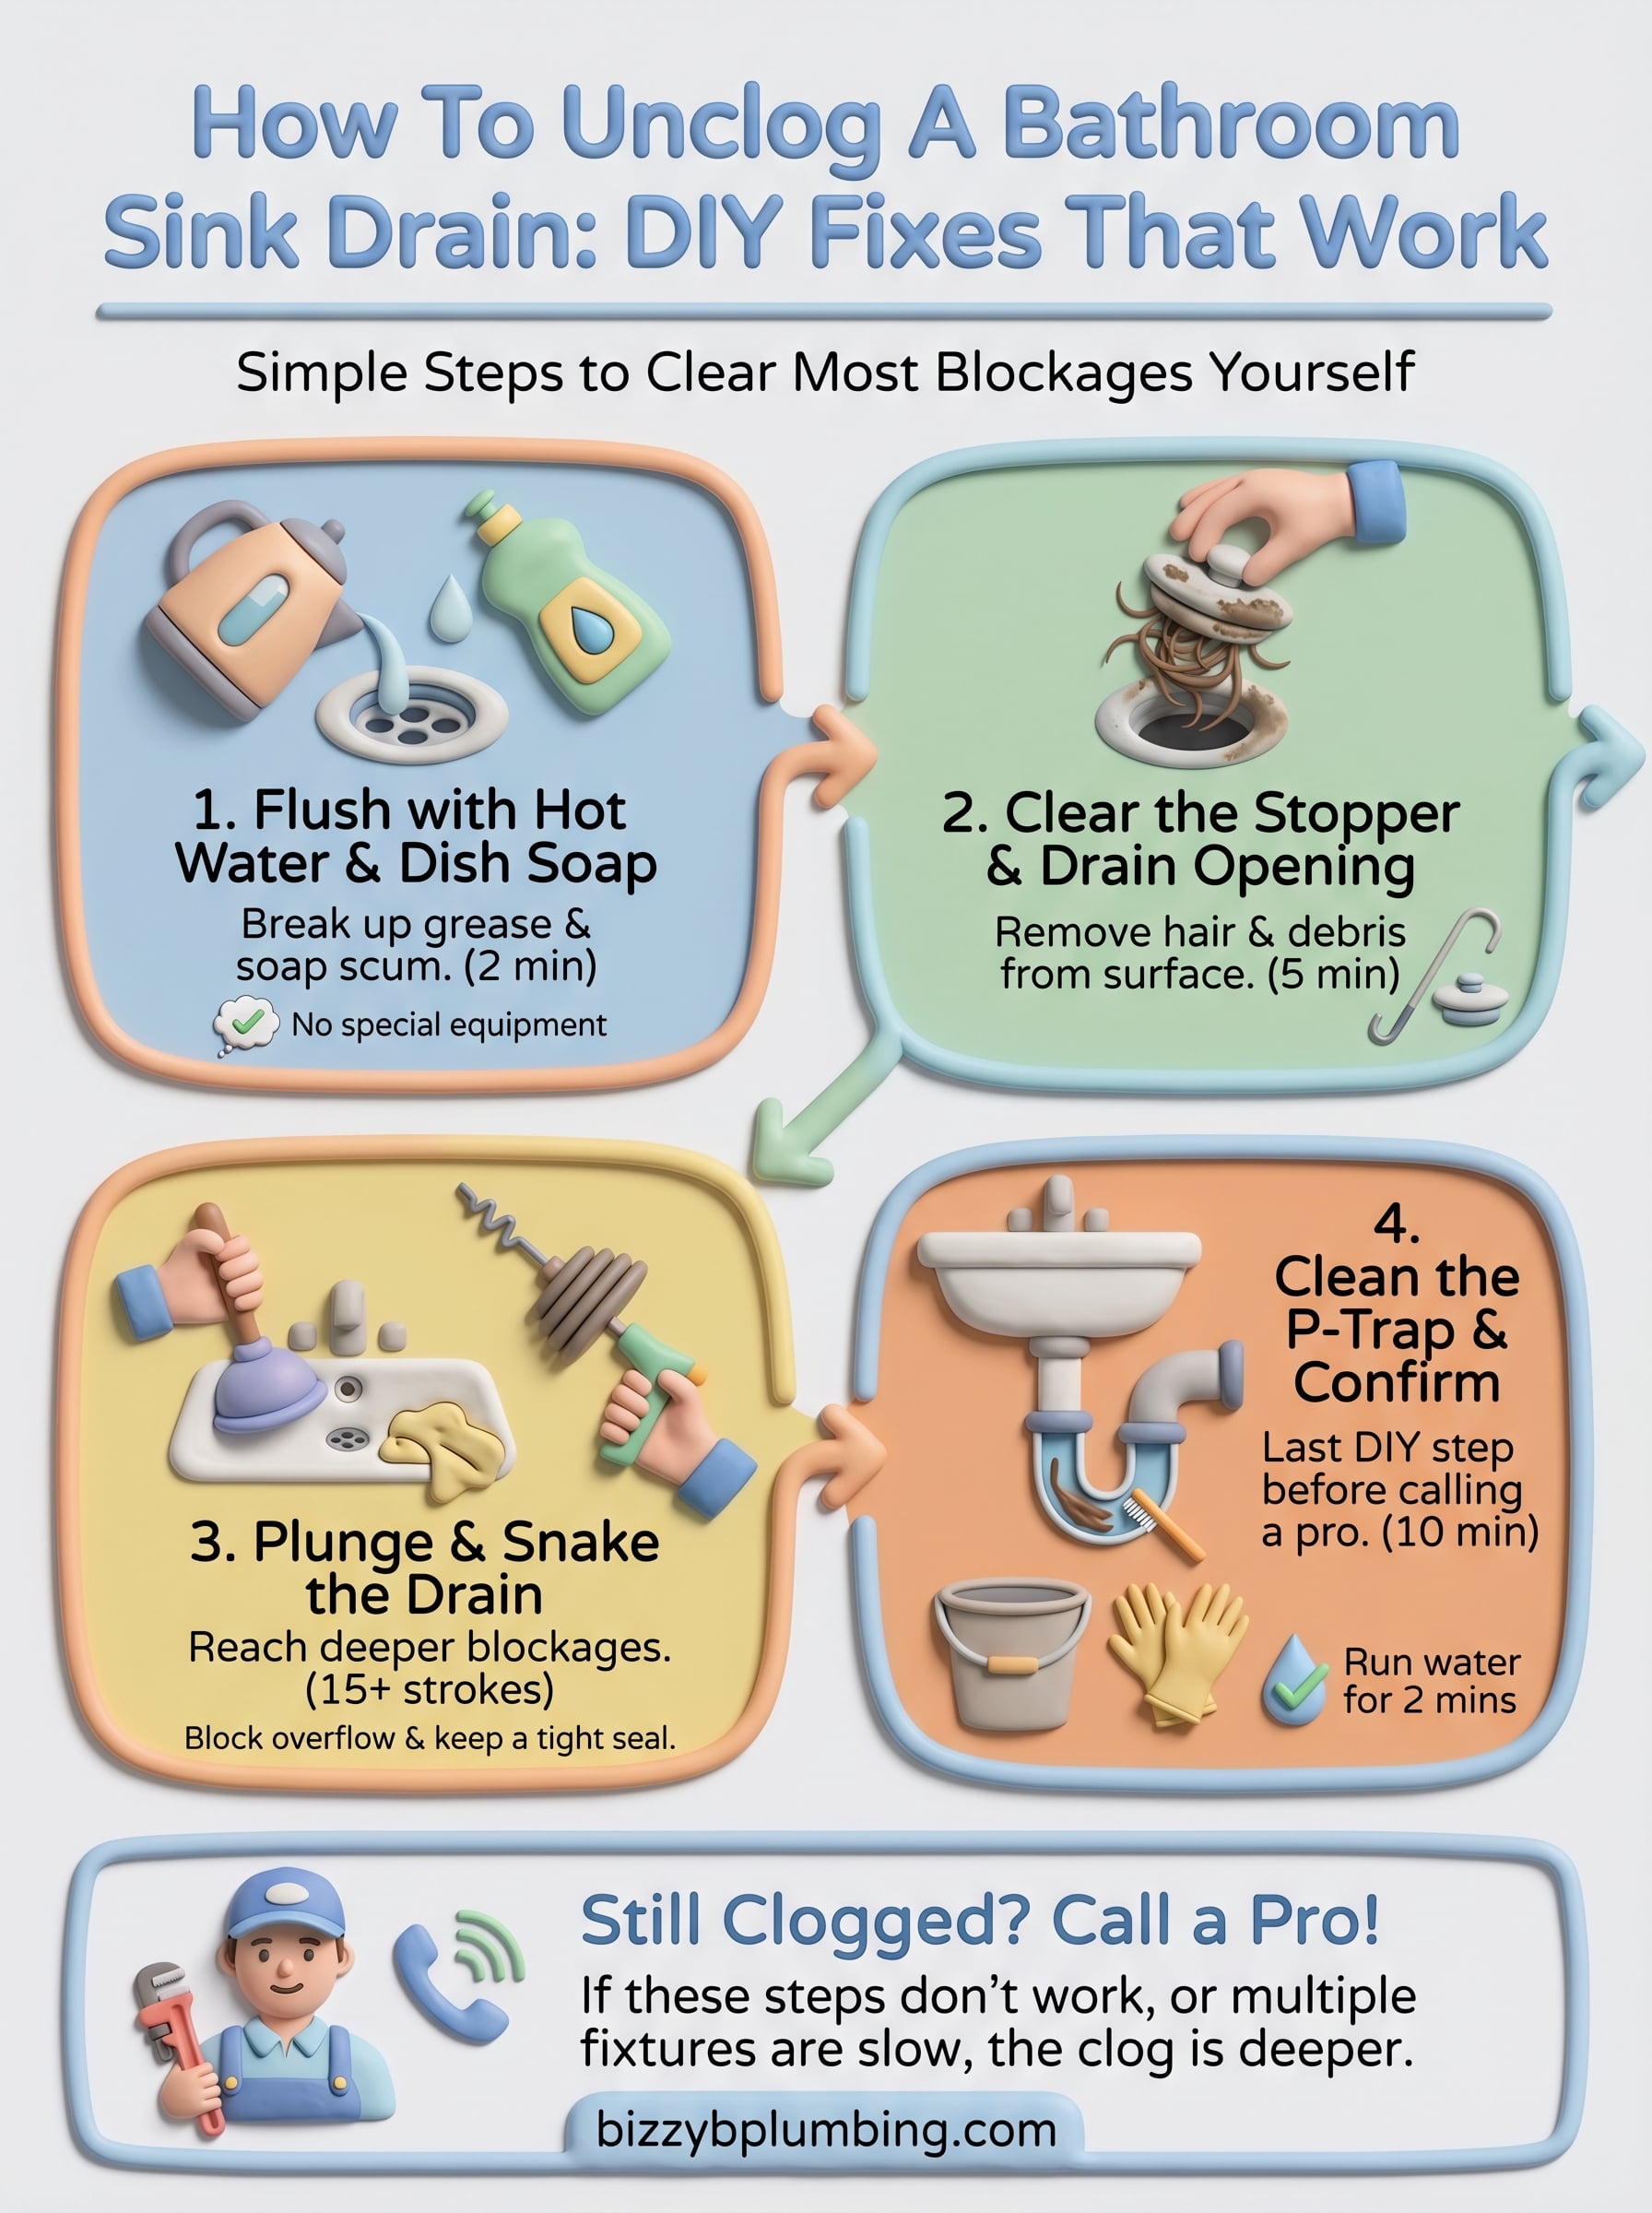
Step 1. Flush soap scum with hot water and dish soap
This is the first thing to try on any slow drain, and it works more often than people expect. Hot water and dish soap break up the greasy soap scum coating that builds up inside your pipe over time. If you’re learning how to unclog a bathroom sink drain for the first time, start here before reaching for anything more aggressive. It costs you nothing, takes about ten minutes, and leaves your pipes in the same condition they were in before you started.
What you’ll need
Gathering your supplies takes less than two minutes. No special equipment is required, and everything you need is probably already in your kitchen.
- A kettle or pot to heat water
- Liquid dish soap (standard, not foaming)
- A measuring cup or mug
- A towel to set on the counter
Keep one important detail in mind: avoid boiling water if your sink has PVC pipes. Water that’s very hot from the tap or brought just below a boil is safer for most home plumbing and still does the job effectively.
How to do it
Squirt two to three tablespoons of dish soap directly down the drain and let it sit for two minutes. The soap acts as a lubricant and starts breaking down the greasy buildup clinging to the pipe walls.
If the water is draining slowly rather than standing completely still, this method alone has a good chance of clearing the blockage on the first try.
Pour a full pot of hot water down the drain slowly in two or three stages, waiting about ten seconds between each pour. Pouring in stages gives the water time to work through the soap and push the loosened buildup further down the line. After the last pour, run your hot tap for another minute and watch how fast the water clears. If the drain is still slow or completely blocked, move on to Step 2.
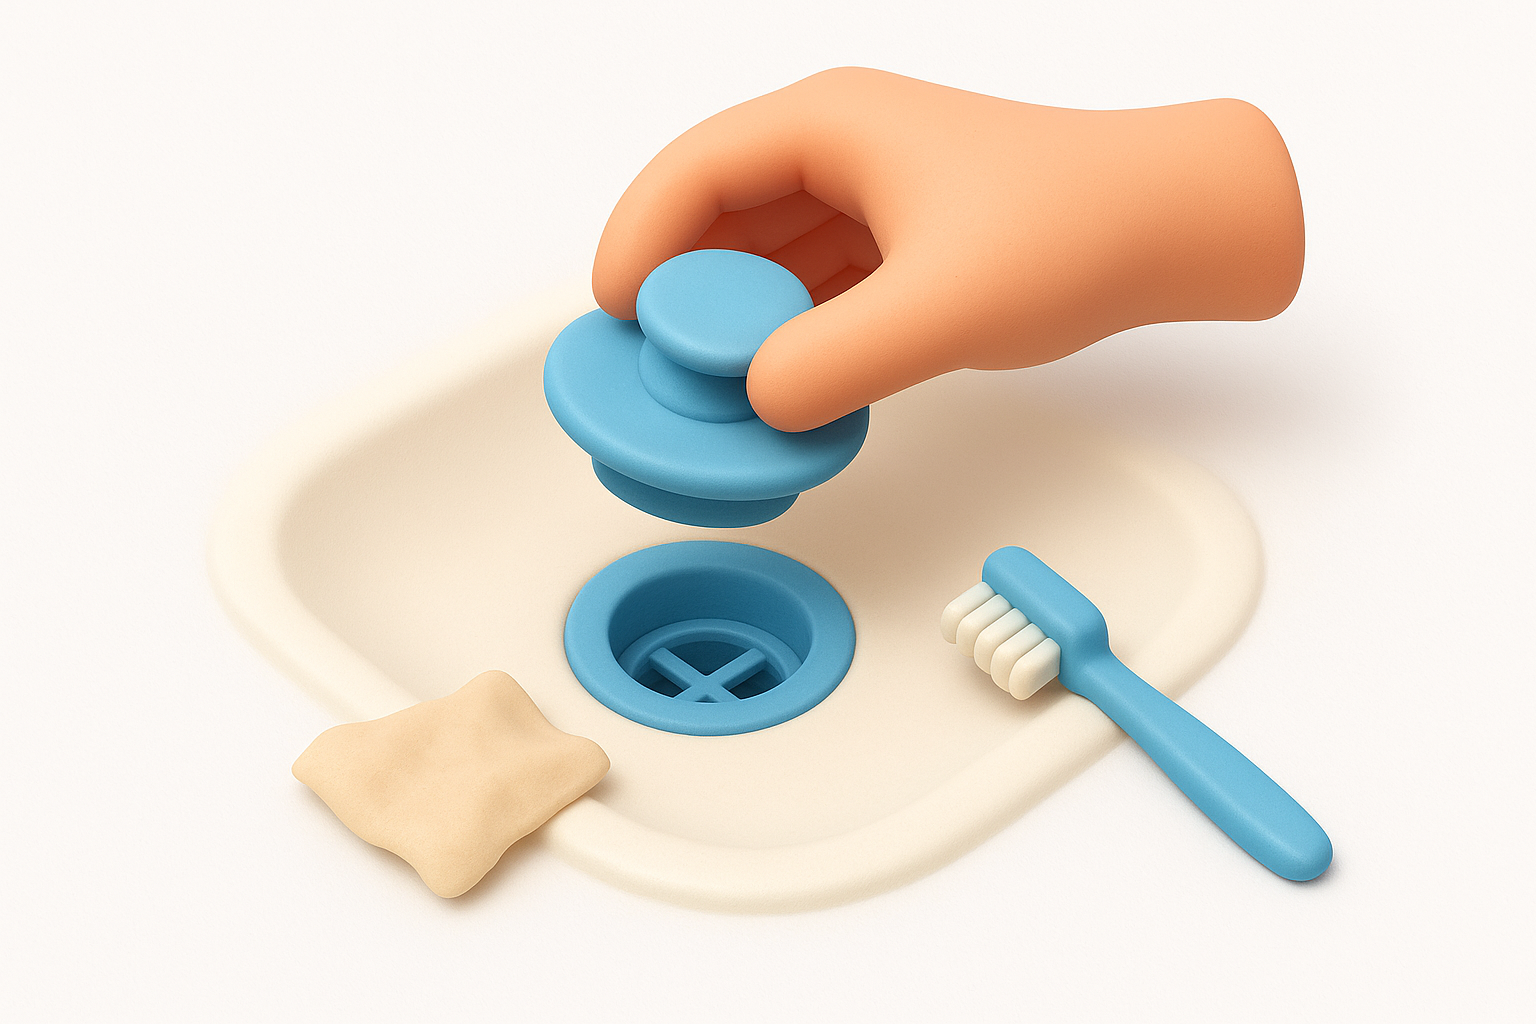
Step 2. Clear the stopper and drain opening
If hot water and dish soap didn’t fully clear the drain, the problem is likely sitting right at the surface. Hair and soap residue collect on and around the stopper, often forming a thick mat you can remove with your hands before attempting anything more involved. This step in how to unclog a bathroom sink drain takes less than five minutes and frequently solves the problem completely.
How to remove the stopper
Most bathroom sink stoppers lift straight out with no tools. Grip the stopper, twist it slightly counterclockwise, and pull up. Some models have a small mounting nut underneath that you can unscrew by hand. If yours doesn’t budge, check under the sink for a vertical pivot rod connected to the drain assembly. Squeeze the spring clip, slide the rod back, and the stopper will lift free.
Once it’s out, what you find will probably not be pleasant. Clean the stopper thoroughly before setting it aside.
- Pull hair off the stopper with your fingers or a paper towel
- Scrub soap scum off with an old toothbrush and dish soap
- Rinse under running water until the stopper is fully clear
A clean stopper goes back in more smoothly and is less likely to catch debris again quickly.
Check the drain opening itself
With the stopper removed, shine a flashlight into the drain opening and look at what’s directly inside. Hair and debris often collect on the crossbars just below the surface. Use a bent wire, a plastic hair clog remover tool, or needle-nose pliers to pull out whatever you see. Work slowly and rotate the tool to grab as much material as possible in one pass rather than pushing it deeper.
After clearing the opening, run hot water for a full minute and watch the drain rate. If water now moves freely, you’re done. If it still drains slowly or stands in the basin, the blockage sits deeper in the pipe and you’ll need to move on to Step 3.
Step 3. Plunge and snake the drain the right way
When hot water and a clean stopper don’t solve the problem, a plunger or drain snake will reach the blockage sitting deeper in the pipe. These two tools handle the majority of stubborn clogs in how to unclog a bathroom sink drain situations, and using them in the right order saves you time. Start with the plunger, then move to the snake only if the plunger doesn’t break through.
Use a cup plunger correctly
A standard cup plunger (the flat-bottomed kind, not the flanged toilet plunger) is the right tool for a sink drain. Before you start, block the overflow opening near the top of the sink basin using a wet rag stuffed firmly into the hole. Without that seal, air escapes through the overflow instead of building pressure against the clog, and the plunger loses most of its force.
Skipping the overflow seal is the most common reason plunging fails to clear a bathroom sink clog.
Follow these steps once the overflow is sealed:
- Add enough water to the basin to cover the plunger cup by about an inch
- Center the cup directly over the drain and press down to form a tight seal
- Push down and pull up firmly, keeping the seal intact, for 15 to 20 strokes
- Lift the plunger and watch whether water drains freely
Repeat two or three times if the first round doesn’t clear it. If the drain remains blocked after several attempts, move to the snake.
Use a drain snake to reach deeper
A hand-operated drain snake (also called a drain auger) pushes a flexible cable into the pipe to physically break up or pull out a blockage that a plunger can’t dislodge. Feed the cable slowly into the drain opening, rotating the handle clockwise as you push forward. When you feel resistance, that’s the clog. Keep rotating and pushing to break through it, then pull the cable back slowly to remove whatever it caught.
Run hot water for a full minute after snaking to flush loose debris out of the pipe before moving on to Step 4.
Step 4. Clean the P-trap and confirm the clog is gone
If plunging and snaking didn’t fully clear the drain, the clog is most likely sitting in the P-trap, the curved pipe section directly under your sink. This is the last hands-on step in how to unclog a bathroom sink drain before calling a professional, and it’s more straightforward than it looks. You don’t need a plumber to do this, just a bucket, a pair of rubber gloves, and about ten minutes.
How to remove and clean the P-trap
Before touching anything, place a bucket directly under the curved pipe to catch standing water and whatever comes out. The P-trap holds water by design, so expect a spill when you open it. Wear your rubber gloves throughout this step.
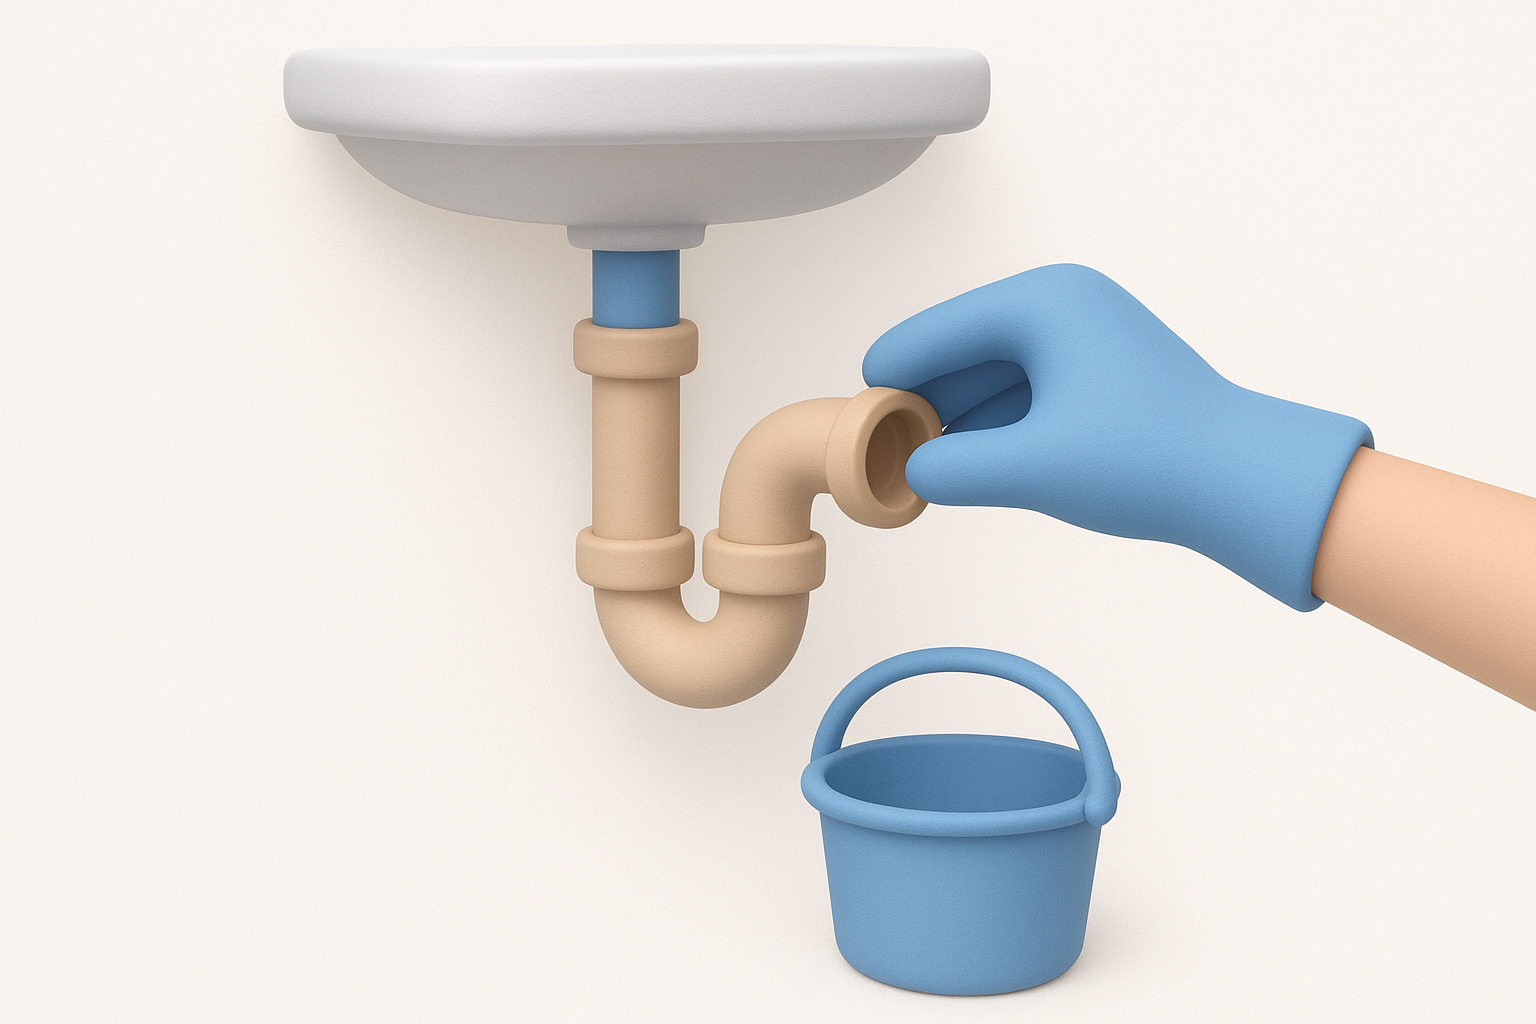
Unscrew the two slip-joint nuts on either side of the curved section by hand. If they’re stuck, use slip-joint pliers, but apply gentle pressure only since over-tightening plastic fittings when reassembling is a common cause of leaks.
Once the P-trap is free, look inside. Hair, soap residue, and debris that made it past the drain opening often collect here. Use an old bottle brush or a paper towel to clean the inside of the curved section thoroughly. Rinse it under running water until the pipe is completely clear with no visible buildup on the walls.
- Remove all debris from inside the curved section
- Check both straight pipe ends for buildup before reconnecting
- Hand-tighten the slip-joint nuts back into place firmly but without forcing them
- Run water immediately after reassembly and check under the sink for drips
Confirm the drain is fully clear
Reinstall the P-trap and run hot water for two full minutes before calling the job done. Watch the basin as it fills and drains. Water should move freely with no pooling or gurgling sounds at the drain. A small gurgle right after snaking or cleaning the trap is normal and usually clears within a few seconds. If the drain still moves slowly after this step, the blockage is deeper in the line and beyond what a standard DIY approach can reach.
Quick wrap-up
Most bathroom sink clogs respond to the four steps in this guide: start with hot water and dish soap to break up soap scum, clear the stopper and drain opening, plunge or snake deeper blockages, and clean the P-trap when nothing else works. Following this sequence in order keeps the job manageable and prevents a minor clog from turning into a bigger repair.
Knowing how to unclog a bathroom sink drain yourself is a useful skill, but some clogs won’t move no matter what you try. If your drain is still slow after cleaning the P-trap, or if multiple fixtures in your home are draining poorly at the same time, the blockage is likely deeper in the main line and beyond what DIY tools can reach.
For homeowners in Knoxville and East Tennessee, Bizzy B Plumbing offers same-day service with upfront pricing and no pressure. If the fixes in this guide didn’t solve the problem, give us a call.


